Character Designs
For University I had to create a series of characters. These characters had to be created to a specified poly limit as well as in a specified theme. When creating these designs, it is important that we iterated upon them and tried to select the best one to further improve our designs as we went.
This was an incredibly fun unit, and I learnt a lot as I went through it. In terms of animation, 3D modelling, texturing, and concepting there were vast improvements for me personally in all of these areas.
An in-depth breakdown of my concept process can be read under the Corpse Harvester.
Corpse Harvester - Giant Mech

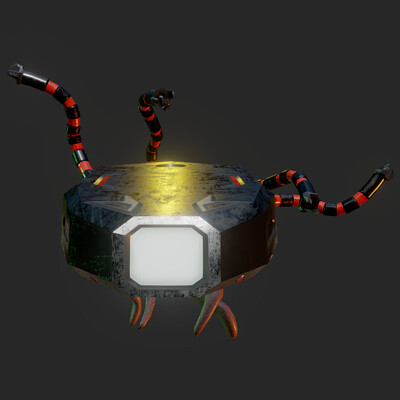
The corpse harvester is a giant mech I created for the first part of the unit. The task was:
- A Sci-Fi Giant Mech.
- 3000 Triangles
- 2 1024x1024 texture maps
Creation of this mech went down several routes. I first brainstormed what kind of giant mech I wanted. I researched into several areas of what constitutes a “giant mech” and found that the western definition compared to the Japanese equivalent is quite loose with its terms.
With that found out I settled upon the concept of creating an alien machine that was a mechanical giant beast. I have often loved concepts such as Cthulhu with its large tendrils and gigantic size as well as creatures such as those seen in Skyline. And so, a giant alien mech seemed a fun first attempt for me.
With my idea brainstormed I moved onto concepting. For this process I started out with thumbnail sketches of my designs. Small drawings that just suggest vague shape and form and help give me ideas on what I could do for my sketches.
After having completed that stage, I then progressed onto some sketches of the ideas I first laid out in the thumbnail process. These sketches helped me to try and evolve my initial ideas and see what came from them. The sketches I created for this can be seen below:

After I had sketched through many designs, I finally selected the one that I felt was the most appropriate for the limits given to me but still looked interesting and fit my goal of a tendril styled giant mech. The sketch I selected for my iteration selection can be seen in the centre of the previous image.
Upon selection of my main “idea” I then began to iterate on these and try to see what came from various variations on the design. The iteration process was a fun one and I found it really useful for looking at the problem from different angles and trying to change portions of the design whilst retaining the overall form of the original. Even with my limited art skills. These iterations can be seen below:

The iterations took various forms, and I was always trying to retain a sense of slight human design to it with an offset of alien. Many of the shapes interested me but did not make sense from a construction standpoint and so I kept trying to shift the shape to see what would work best for the design but also be functional.
Following the arrows, you can see that I settled upon the centre design as my favourite and proceeded to take this and draft up a character sheet. If I were to hand this to a modeller or some other artist for further development or creation a character sheet is necessary to show of the shape and form from all sides and so I proceeded to draw from there. The final character sheet can be seen below:

Having studied several various character sheets in the industry I settled on a design I liked which used a color key to describe the two important colour choices in the character and displayed it in a visually interesting, yet functional fashion.
The final creation of the character can be seen in live preview below.
Laury - Dino Mech

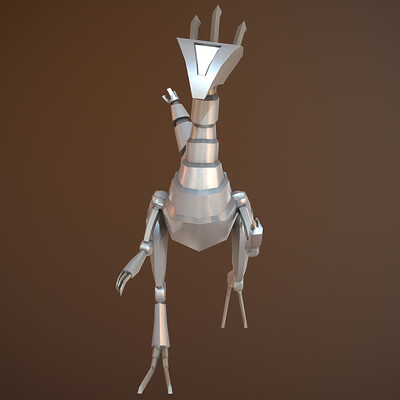
Laury is a dino-mech I created for the final part of the unit. The task was:
- A Dinosaur Mech
- 3000 Triangles
- 1 1024x1024 texture maps
The process worked in similar fashion to that of the corpse harvester. Having learned from the past character I was now able to apply my process in a more straightforward manner and focus on developing my skills.
Approaching the design of this character I wanted to go for something a bit cute and child-like and meld its purpose around that of a being a robot built from scraps. I tried to follow the story design approach to character this time whereby I tried to identify the following questions:
- What is its purpose?
- What is its history?
- Where is it found/based around?
- What does it do?
With these vague questions it can help to inform what the character or creature is and thereby can help inform design ideas for its texture or shape. A scar from a battle, a scrappy and broken metal arm from overuse etc. Answering some very short simple questions can help keep the design in universe and in-check.
With that out of the way. I followed the process as normal and did some thumbnails before moving onto sketching of these ideas which can be seen below.

I looked at various types of dinosaurs and I loved some of the traits of the Triceratops and Brontosaurus as they had an intimidating but cute look. Some of my designs went between cutesy and nice to quite intimidating and scary. With these designs done I chose the one I liked the most and felt would fit the limitations again which can be seen in the centre.

After selecting my final one I went through an iteration process. Having already greatly liked the original design but felt it was too intimidating I did not change a great deal as the feedback I got from my lecturer and friends is that the design overall was good. So, for my iterations I focused mainly on tweaking its overall form to make it cutesier in a profile view. This design choice was based around the concept of silhouetting. If people found the silhouette cute or fun, then I had a good starting base for the redesign.
Following the arrows my final choice was selected and I proceeded to again create a character sheet of it.

Consistency in design was important to me so I re-used the template of my previous character sheet to keep a cohesive feel about my works. A live preview of the model can also be found below.
Vivi - Animated Character

For the advanced part of the unit, we had to create, rig and animate a character. This character did not have any specific restrictions beyond a bone count of 128 and a loose poly limit of 30k polys.
For this character I follow my previous practices and created a character design which I proceeded to draw in a wireframe view to make modelling easier. Upon the creation of the character design, I placed it into a character sheet with a rough texture style applied to her which can be seen below.

I had not attempted or made any humanoid characters before this point and so I spent a great deal of time trying to understand best topology practices for anatomy and form.
The character was modelled and then unwrapped within 3DS Max. I then brought her into Maya to rig and then skin. This was another process I have never attempted before and so I spent a good deal of time practising it. After skinning and rigging I then textured it within Substance Painter and used Designer for some texture creation.
Finally, she was brought back into 3DS Max for animations as this is what the brief specified it needed to be in to be marked. I would have ideally rigged within 3DS Max had I known that it was necessary for the brief for animations.
A final model and walk animation can be seen below in a live preview.
As well as the creation of the character I had to animate her and other things to form a 1-minute animation reel. For this reel I studied good practices for 3D animation and tried to follow sheets and workflows for walk cycles and the 12 principles. In some of the animations such as the ball and her walk cycles, I tried to make strong use of the principles. In others I feel they are a bit rigid as I did not make a strong enough use of them. Overall, I feel it is a solid attempt for my first-time doing animation of any kind. The final result can be seen below: